Cloudflare is an excellent tool in both speeding up your website with their CDN as well as protecting your site with their proxying services. However, you will soon notice that you’re not getting your visitor’s actual IP address but the IP address of the Cloudflare node your visitor is coming from. This can be problematic as analytics and reporting can be wrong. Also, it can interfere with WordPress security plugins as they will block Cloudflare IPs and not the actual malicious user.
In order to get the real IP from your visitor and give it to WordPress, we need to create and install a must use plugin. A must use plugin or MU plugin is a plugin that cannot be deactivated, it’s given higher priority over normal plugins, and it’s enabled across a WordPress MU network.
| You will need to have FTP or cPanel access to do this as we need to create a folder and upload a file. |
In cPanel’s File Manager or in your FTP client, navigate to where WordPress is installed. For example, it is usually installed in the public_html directory if you normally type in your domain to get to your site. From there, open the wp-content directory and look for a directory called mu-plugins. If you don’t see it, create a new folder and call it mu-plugins. In that folder, create a new file (if you’re using the cPanel File Manager, click the new file button and call it cloudflare-restore-ip.php and then click on it and click the edit button). If you’re doing this from your computer, open up a text editor (on Windows, open Notepad; if you’re on a Mac, open TextEdit and then press Shift + CMD + T at the same time to make the document plain text) and then copy the following code:
<?php

if ( isset( $_SERVER["HTTP_CF_CONNECTING_IP"] ) ) {
 $_SERVER['REMOTE_ADDR'] = $_SERVER["HTTP_CF_CONNECTING_IP"];
}

?>
Now paste it in the file you just made or in your Notepad or TextEditor window. If you’re using cPanel’s File Manager, click on save. If you’re using Notepad or TextEdit, save the file as cloudflare-restore-ip.php (keep in mind that your editor will try to save this as a txt file! In the Save As box in Notepad, change .txt in the drop down to All Files) and then upload it to the mu-plugins folder.
When you upload it, it should look like this:

If it says cloudflare-restore-ip.php.txt, you will need to rename it. In your FTP client, select the file on the server side, right click, and find the rename option.
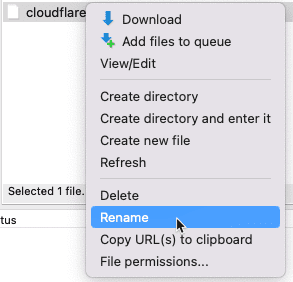
Then, just select “.txt” and delete it. If you’re asked about changing the file extension, accept it.
![]()
If you use the cPanel file manager, it works the same way – except instead of right clicking after selecting the file, click on “Rename” in the top bar.
And that’s it! You will now start seeing the real IP address of your website visitors in cPanel.
Are you having trouble or receiving error messages after following this guide? Please open a support ticket and our tech team will assist.
